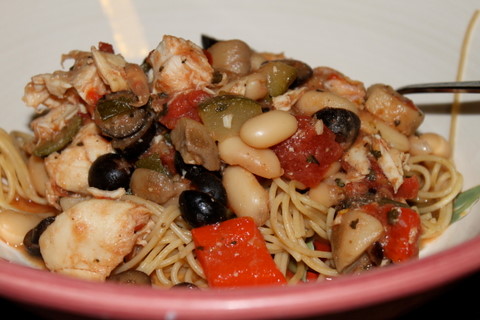
Chicken Enchilada Chili

Alex joined Cub Scouts this year and now on Wednesday nights, he has his pack and den meetings at 6:30, which is our usual dinner time. And it also just so happens that Wednesday night is the only weeknight when Eric isn’t at work. So, we’ve made every effort to continue a family meal on those nights even though it can get a little crazy around the house at that time.

To minimize the stress for all of us, I’ve been relying on crockpot meals or things that can simmer all day. Chili seems to be my top choice lately. But since we all like variety, I’ve been experimenting with some different kinds. This Chicken Enchilada Chili has definitely been our favorite so far. It’s spicy, but in a subtle way so that the kids enjoyed it just as much as the adults.

This is definitely an easy meal that is a little different from my norm since it relies on canned enchilada sauce. Although I make homemade red enchilada sauce, I’ve never attempted a homemade green sauce, partially because I always have a difficult time finding tomatillos. If you have a good homemade sauce recipe though, I’d definitely recommend using that! (And if you do have a good recipe, I’d love if you’d share it with us!)

Chicken Enchilada Chili

  • 1 T. oil
  • 1 onion, diced
  • 4 cloves garlic, minced
  • 1 6 oz. can diced fire-roasted green chilies, not drained
  • 1 lb. chicken breasts
  • 4 c. chicken stock
  • 2 14 oz. cans green Enchilada sauce
  • 2 15 oz. cans Great Northern beans, rinsed and drained
  • 1/2 t. salt
  • 1/2 t. black pepper
  • 1/3 c. diced cilantro, plus more for garnish
  • 2 T. corn meal
  • Additional garnish: shredded cheese, sour cream, tortilla chips

1. Heat oil in a large pot. Add onion and cook for about 5 minutes, until translucent. Add garlic and cook an additional 2 minutes. Stir in diced green chilies and liquid.

2. Add chicken to pot and pour in the stock, enchilada sauce and beans. Bring to a boil then reduce heat to low and simmer at least 30-45 minutes, until chicken is fully cooked. (Or simmer all day, if you want.)

3. Remove chicken and shred or dice. Return to the pot along with the salt, pepper and 1/3 cup cilantro. Stir to combine then stir in cornmeal just until thickened.

4. Garnish individual bowls of chili with shredded cheese, sour cream and extra cilantro, as desired. Serve with tortilla chips.

  • Share/Bookmark

Rice & Bean Stuffed Pepper Cups

I love recipes that are easy to personalize and easy to switch up with different tastes whenever needed. Recipes like this are the basis for many of the recipes I’ve written on this site. Change a few elements here, add a few different spices there and you’ve got a new dish. That’s nothing new though, is it? I know there are tons of options for which this method works! I’d love for you to share your favorite!

With these Rice & Bean Stuffed Pepper Cups, the options are virtually endless, making them a great side dish with almost any meal. Here are some of the ideas I had for switching it up while I was making them tonight

  • Use red beans and chili spices for Chilli Rice Stuffed Pepper Cups
  • Use salsa and black beans for Mexican Rice & Bean Stuffed Pepper Cups
  • Use orzo, barley or quinoa in place of the rice
  • Add some extra veggies for more texture and flavor
  • Use red, yellow or orange peppers instead of green

Rice & Bean Stuffed Pepper Cups

  • 1 1/2 c. cooked rice
  • 1 15 oz. can garbanzo beans, rinsed and drained
  • 1 15 oz. can petite diced tomatoes, some liquid drained
  • 1/4 c. Parmesan cheese
  • 1 t. salt
  • 1 t. Italian seasoning
  • 1/2 t. garlic powder
  • 1/2 t. black pepper
  • 1/8 t. crushed red pepper flakes
  • 1 15 oz. can tomato sauce
  • 4 green peppers
  • 1 c. shredded Italian blend cheese

1. Combine rice, garbanzo beans, petite diced tomatoes, Parmesan cheese and spices in a bowl. Pour half of the tomato sauce into a 13×9 (or similar) casserole dish.

2. Cut green peppers in half lengthwise and scoop out seeds and membranes. Place bottom side down in the casserole dish.

3. Generously spoon the rice and bean mixture into the peppers.

4. Pour remaining tomato sauce on top of the peppers. Cover casserole dish with foil and bake at 350 degrees for 30 minutes.

5. Remove foil and sprinkle cheese on top of the peppers. Bake an additional 10 minutes, until cheese is melted.

These peppers are delicious as is, but definitely make it your own with any of the suggestions above, or anything else that sounds good to you!

  • Share/Bookmark

BBQ Nachos

Apparently, BBQ Nachos are a thing. I had no idea until after I was raving over this meal with my husband and saying how I couldn’t believe I hadn’t thought of it sooner. His reponse was “you’ve really never had them before?” Um…obviously not. I felt a bit like a dummy, but hey, I guess there are only so many new ideas out there when it comes to meals.

Sometimes, the truth hurts. But I’m so glad Eric has agreed to be my taste-tester and my truth-teller. And you all should be too. I can’t tell you how many times our dinner table conversation has included him telling me that something is not blog-worthy or that it needs to be re-worked to have some flavor before I post about it.

Anyhow, in case you’ve been living under a rock like I appearantly have, I wanted to share this recipe with you. I loved it! I’m already plotting ways to make sure I have leftover pork or chicken every single time we grill this summer just so I can whip this up.

BBQ Nachos

  • 1/2 – 1 lb. fully cooked pork or chicken, diced or shredded (leftovers work perfectly!)
  • 1 15 oz. can kidney beans, rinsed and drained
  • 1 1/2 c. barbecue sauce
  • Tortilla chips
  • 2 fresh ears corn, kernels cut off
  • 1/3 c. sliced green onions
  • 2 c. shredded cheddar cheese

1. Combine meat with kidney beans and barbecue sauce in a bowl. Stir to incorporate.

2. Spread tortilla chips on a baking sheet and spoon bbq mixture on top. Sprinkle with freshly cut corn kernels, green onions and cheese. Bake at 325 degrees for about 15 minutes, until cheese is completely melted.

If you don’t want to turn on the oven, you can also prepare this on individual plates and then microwave until the cheese is melted.

So…BBQ Nachos…have you had them before?

  • Share/Bookmark
Blog Widget by LinkWithin