
30 Beet Recipes That Are Almost Too Pretty To Eat!

Cranberry Jalapeño Meatballs (The Party Appetizer That Disappears First)

What to Serve With Cranberry Jalapeno Meatballs

Perfect Creamy Mashed Potatoes (The Only Recipe You'll Ever Need)

The Best Homemade Swedish Meatballs (Better Than IKEA, I Promise!)

Tasty Orange Snowball Cookies

Crispy Brussels Sprouts & Red Cabbage with Bacon

10 Desserts To Serve With Chili

33 Side Dishes To Serve With Lasagna

Candy Cane Snowballs
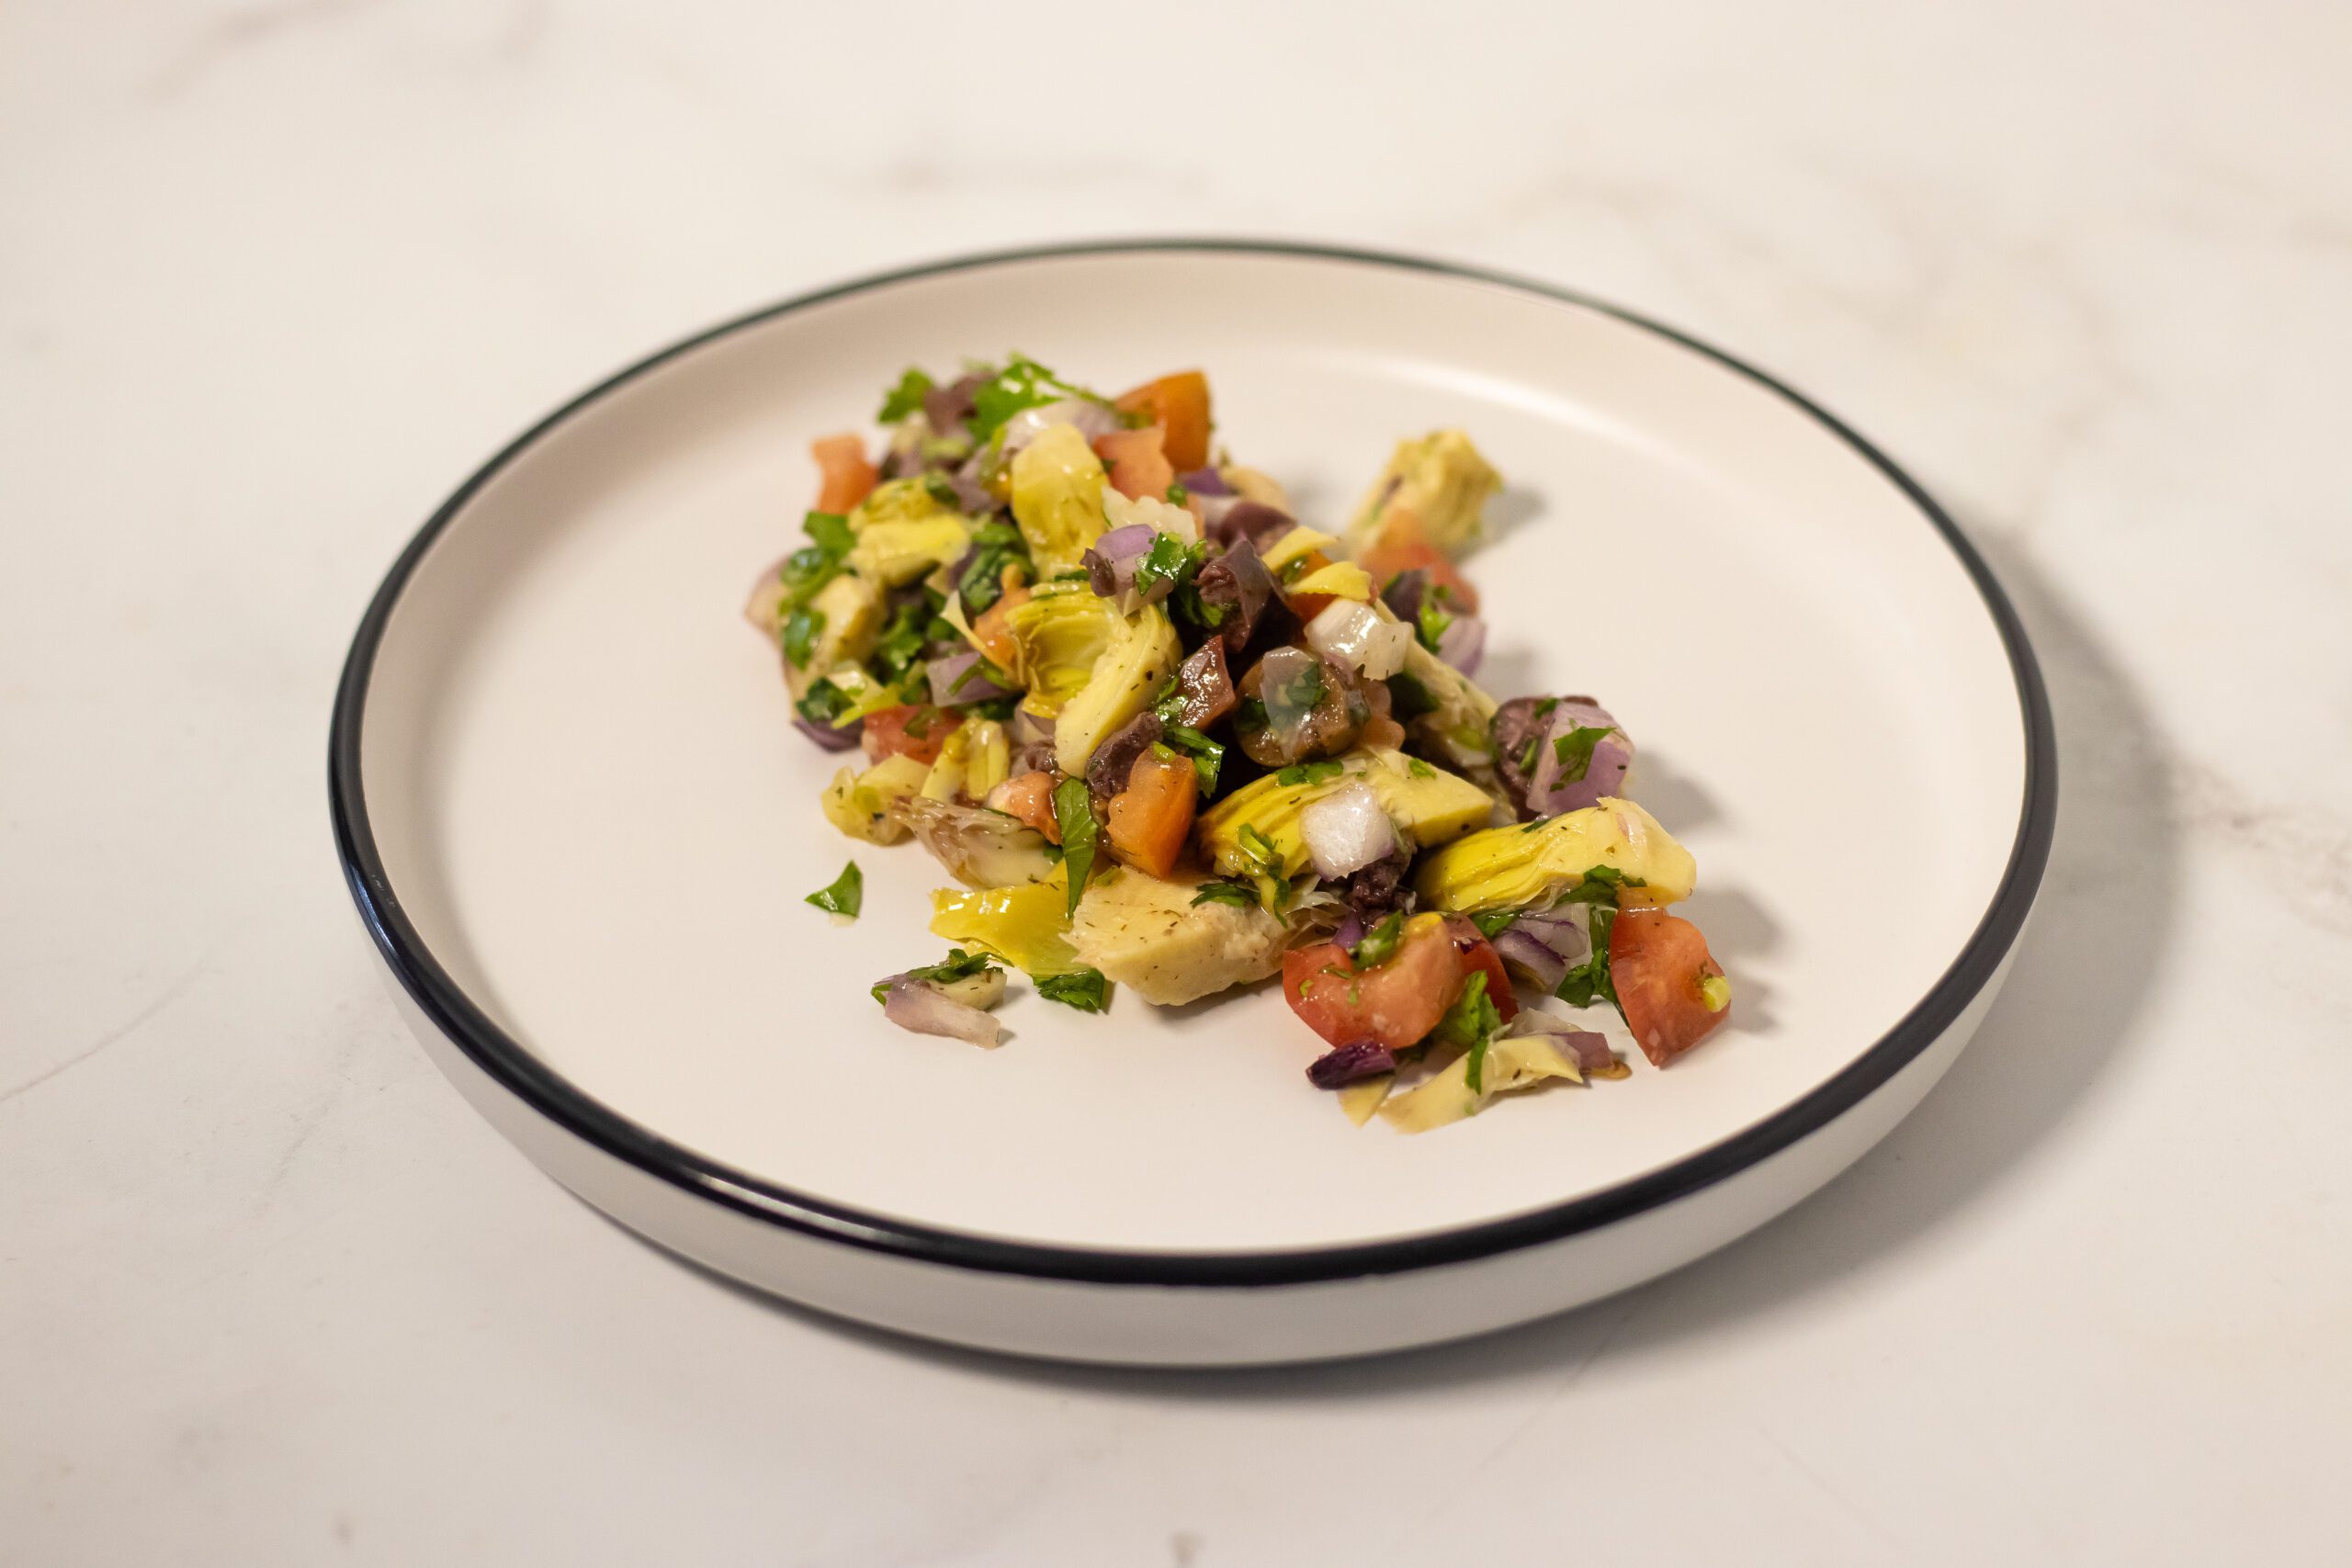
Artichoke Salsa Appetizer

Chicken Brie Spaghetti

Caribbean Pork Stew
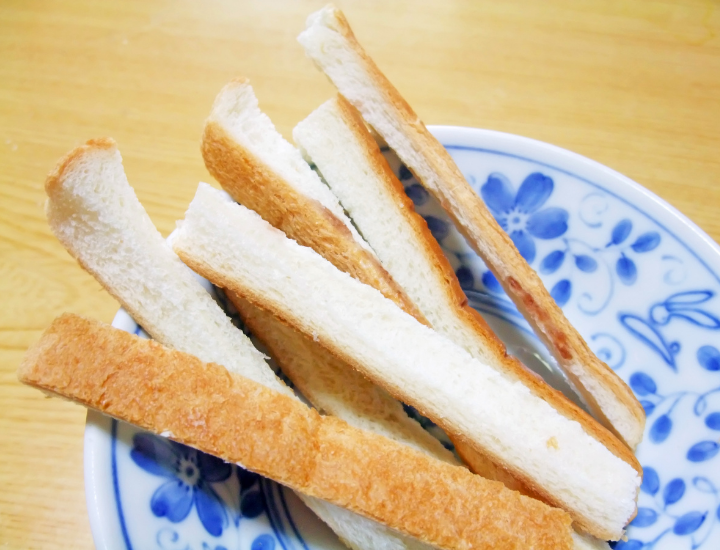
What To Do With Leftover Bread Crusts

Homemade Doughnuts

What to Serve With Mississippi Pot Roast: 13 Best Side Dishes
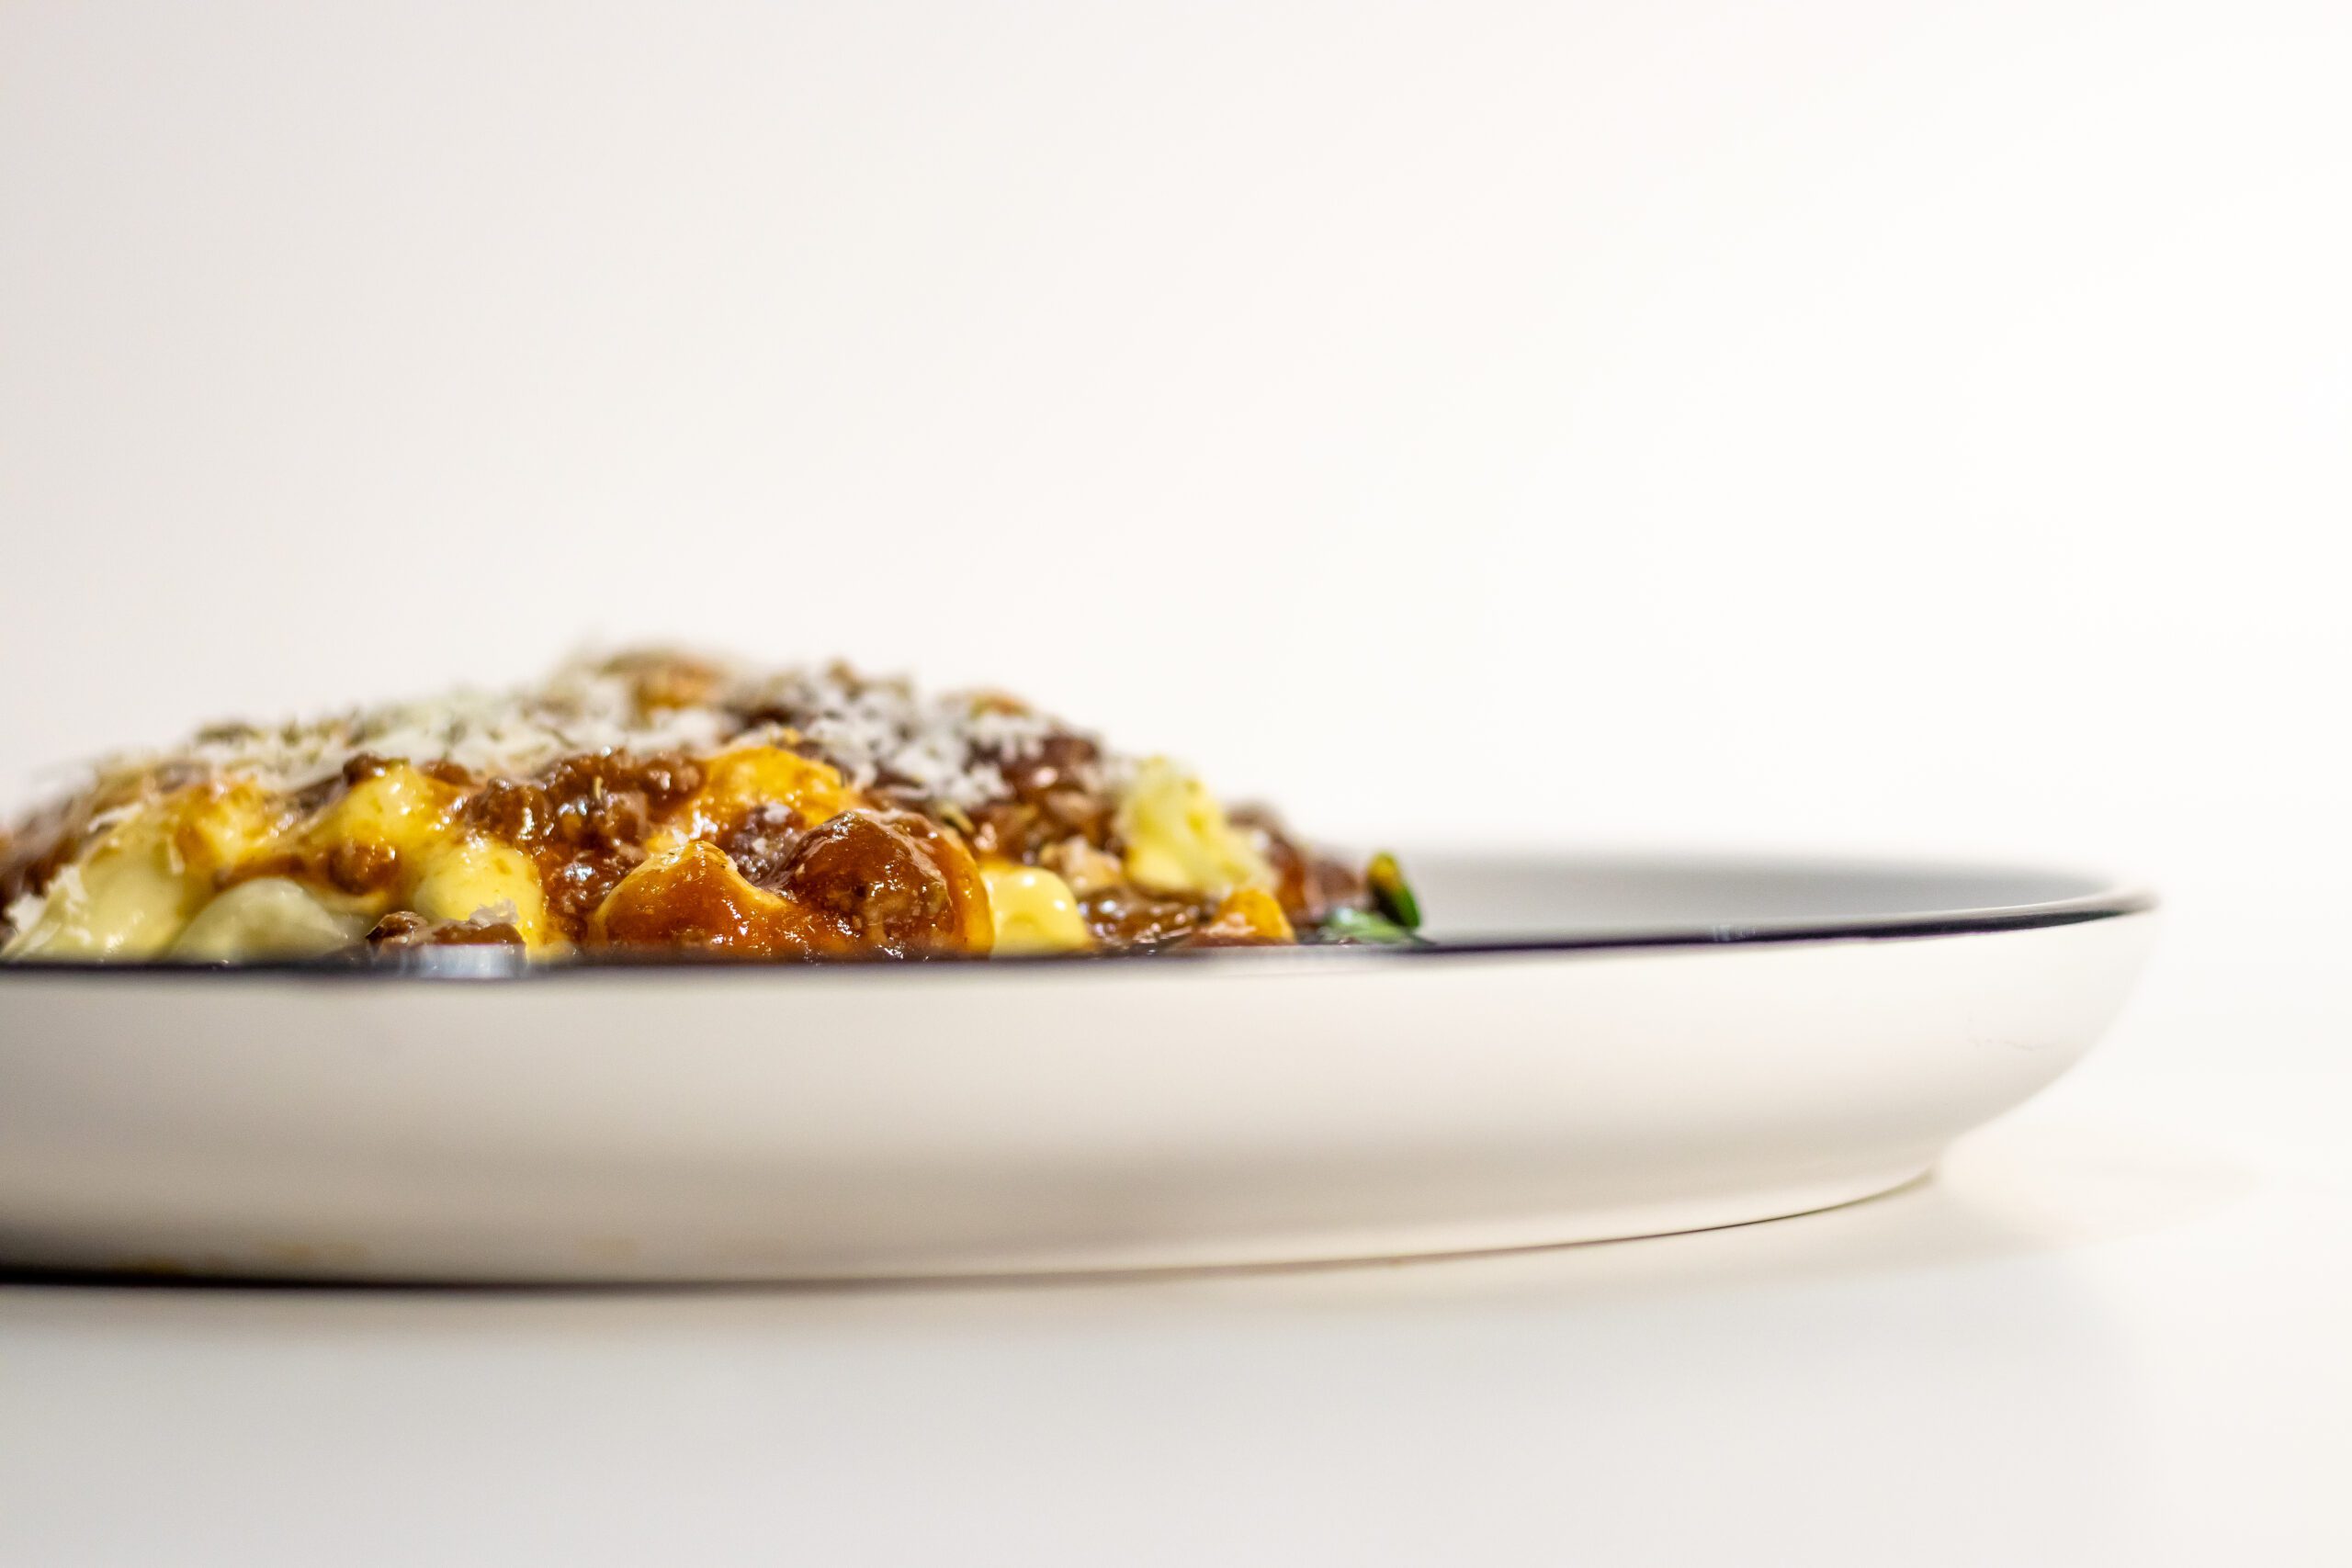
Homemade Beefaroni

10 Best April Fools Day Recipes

Chili Cheese Potato Casserole

Cajun Chicken Noodle Soup
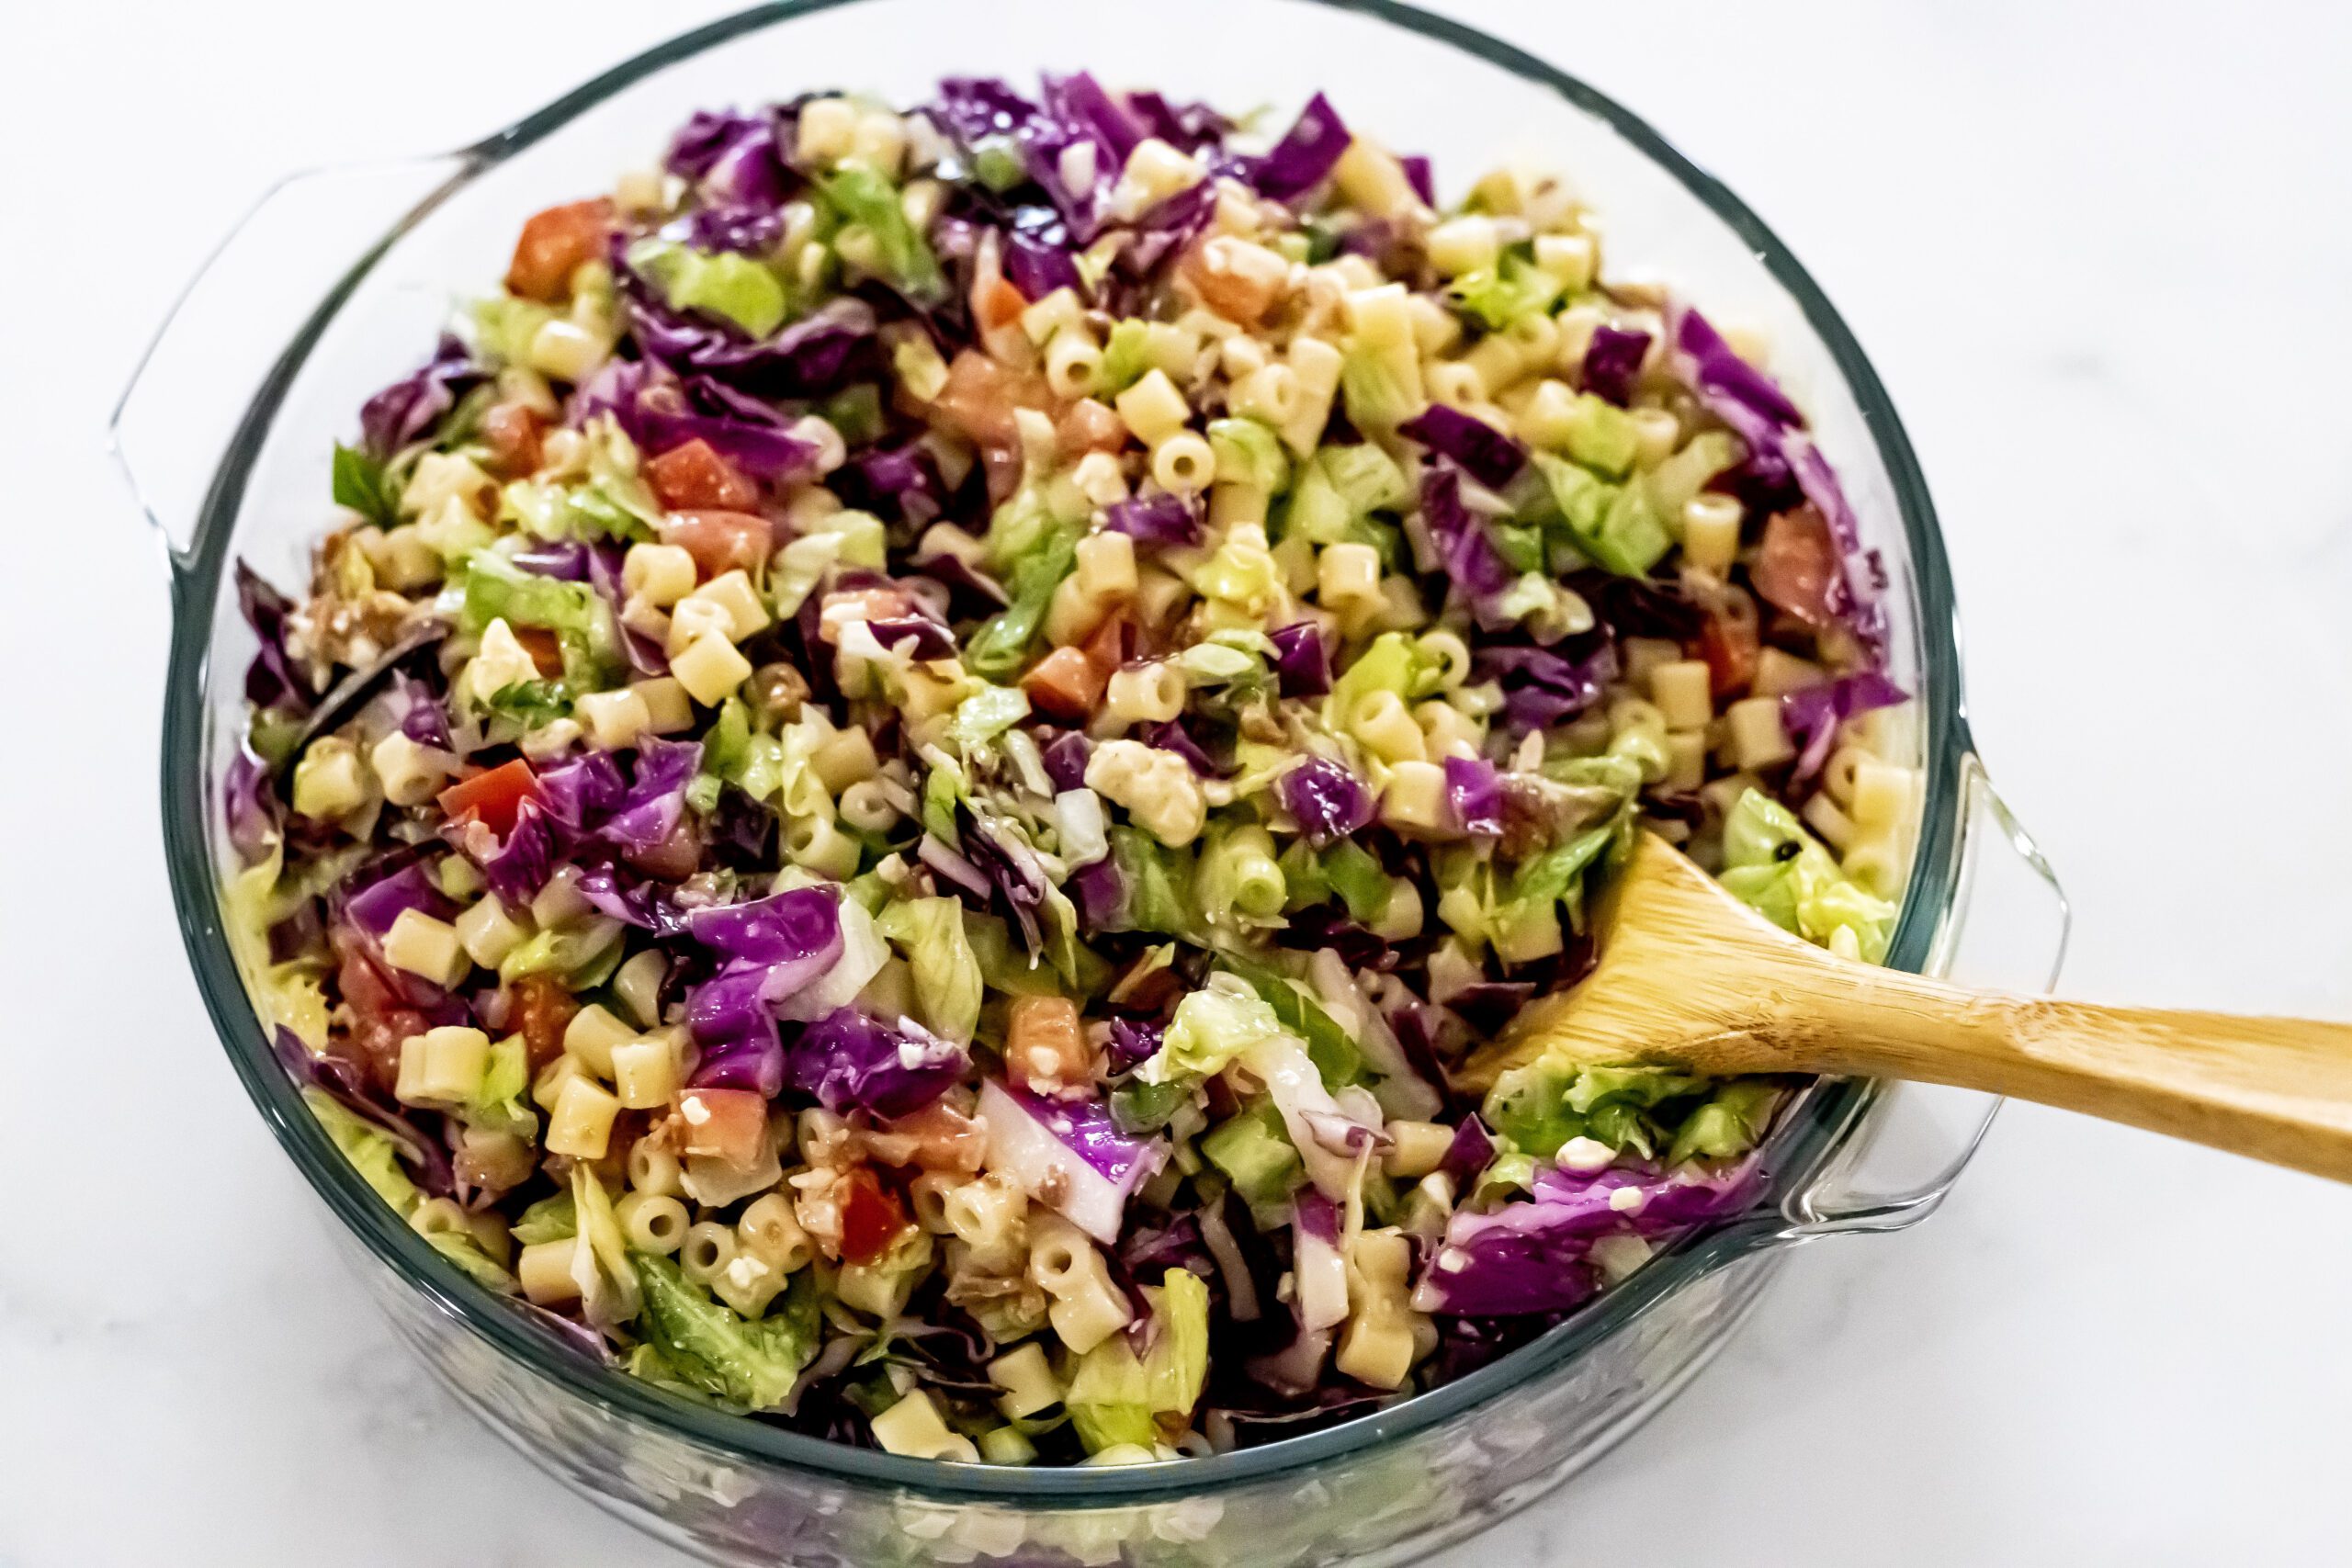
Homemade Portillo's Chopped Salad Recipe

Top 10 Independence Day Recipes

Taco Mac

Top 10 Super Bowl Recipes

Apple Bread Pudding

Strawberry Kiwi Muffins

Chicken Pesto & Couscous Salad

Butterscotch No-Bake Cookies

Brown Sugar Chicken

Berry Baked French Toast

Crock Pot Country Chicken
Lazy Pierogi

Pizza Pie Bites

Fluffy & Flaky Biscuits
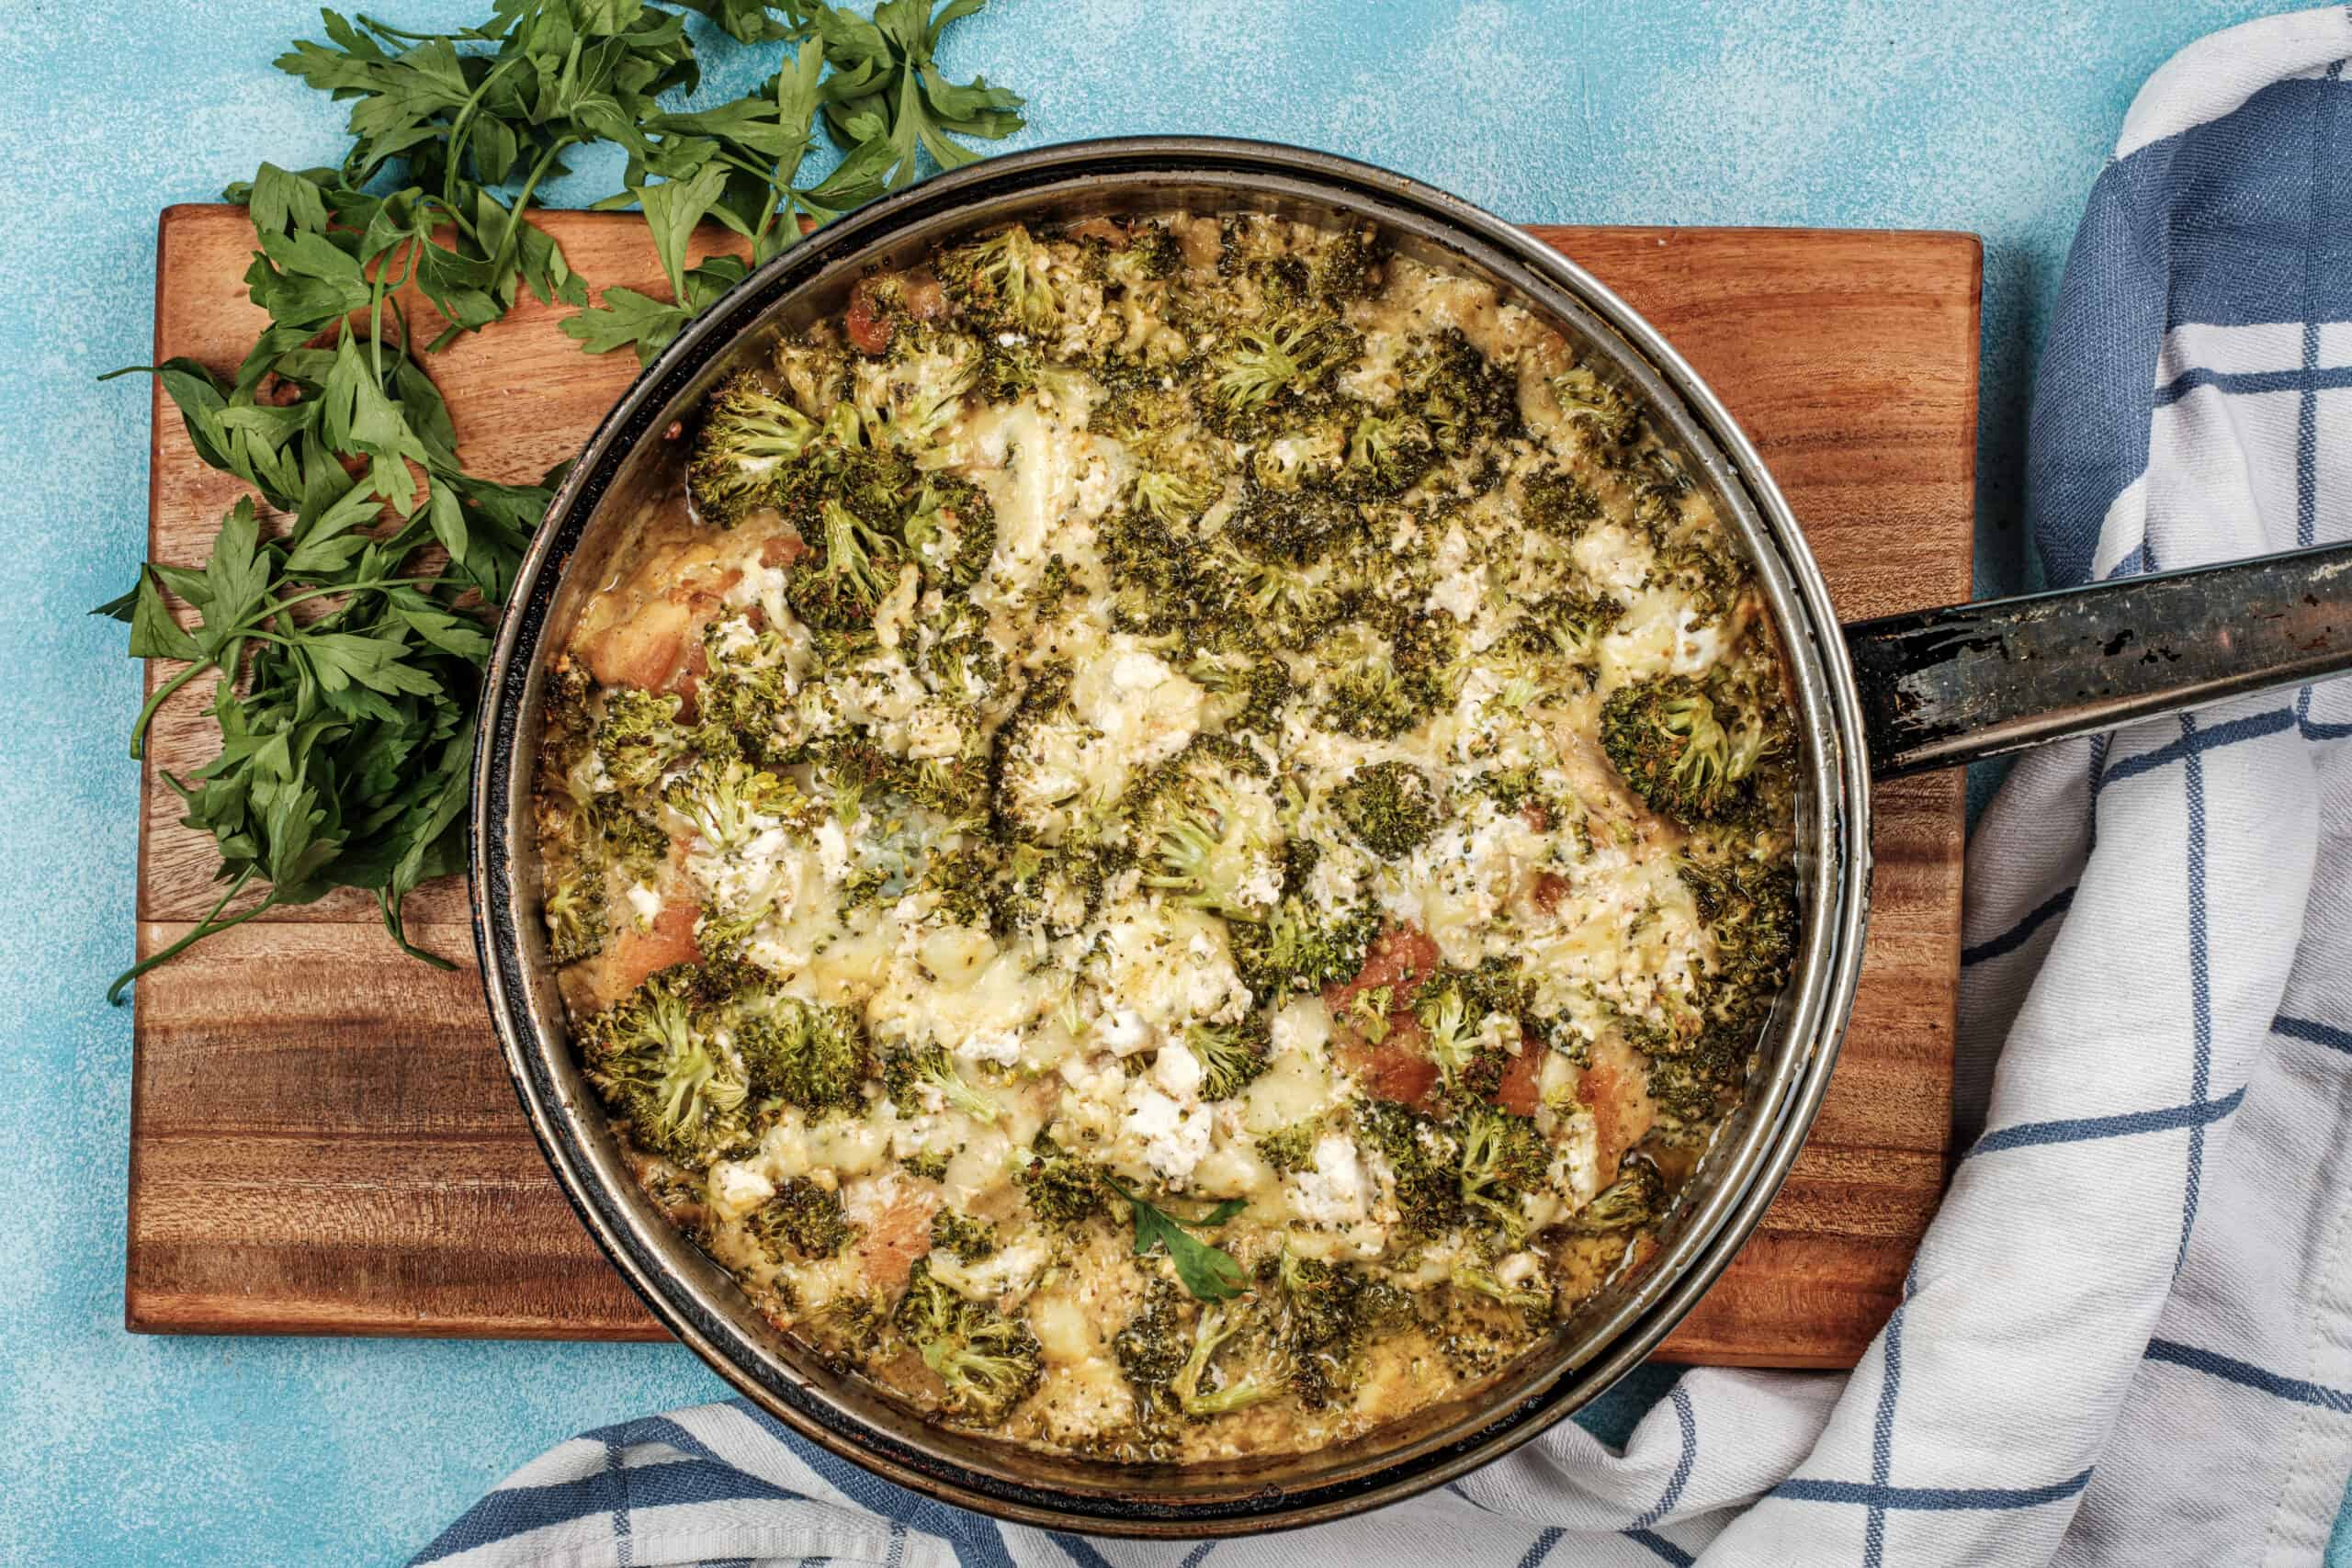
Deconstructed Broccoli & Cheese Stuffed Chicken Breasts

Monterey Chicken Recipe

Scotch Teas ( Scottish)

Crustless Coconut Pie

Strawberry Milano Cupcakes

Apple Jacks Cereal Cookies

Blackened Chicken with Cajun Alfredo Sauce
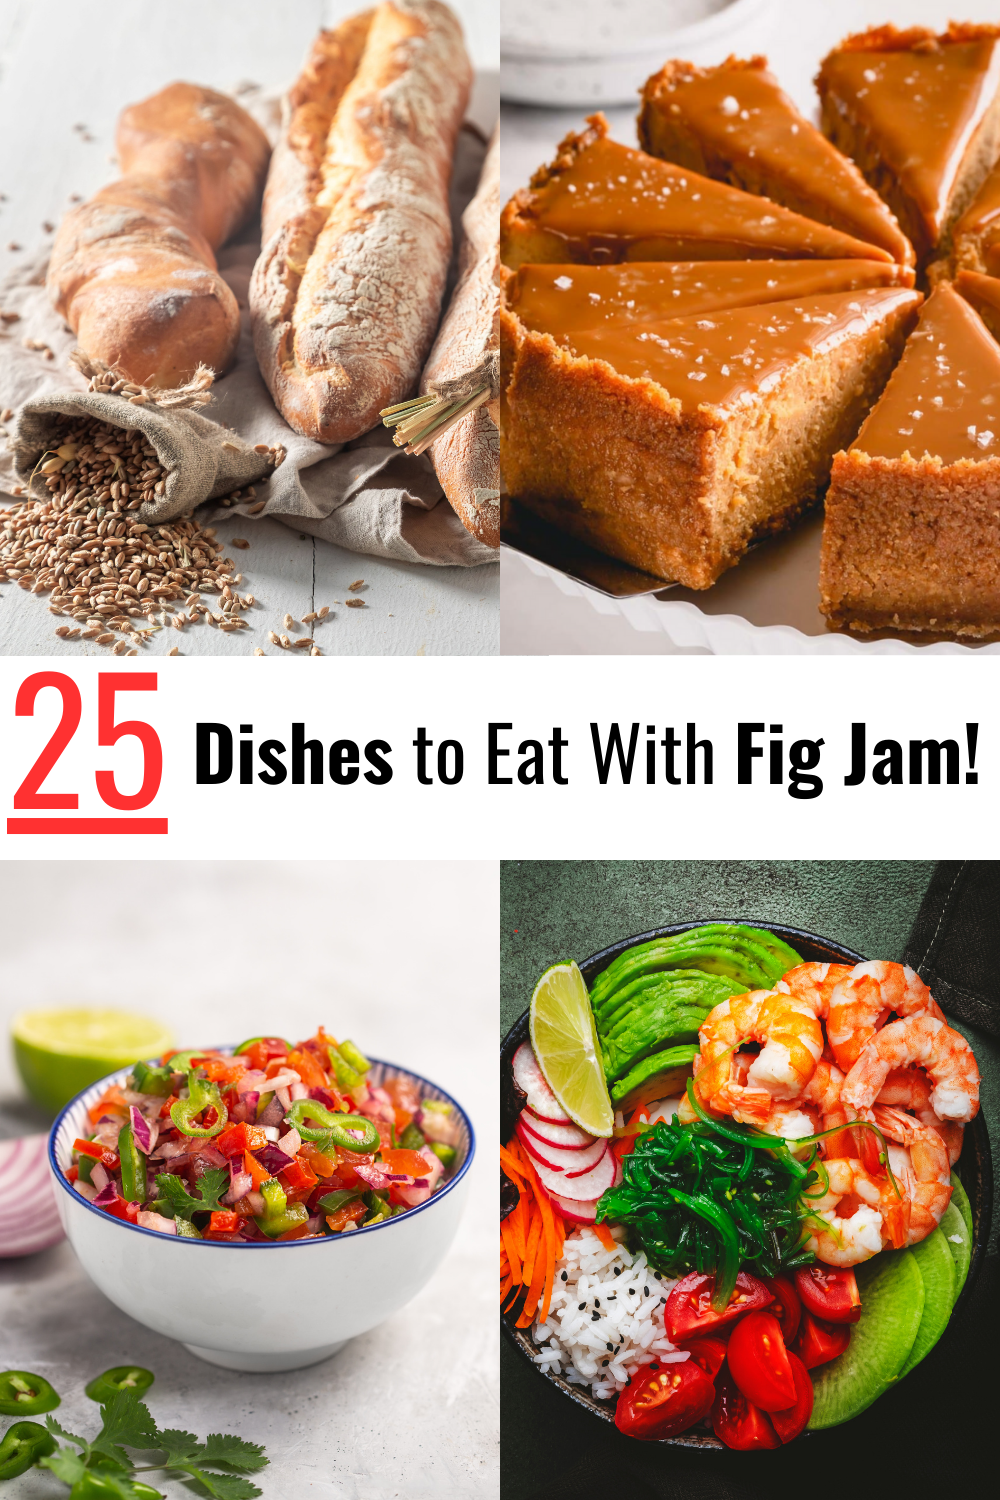
12 Dishes & 13 Cheeses to Eat With Fig Jam

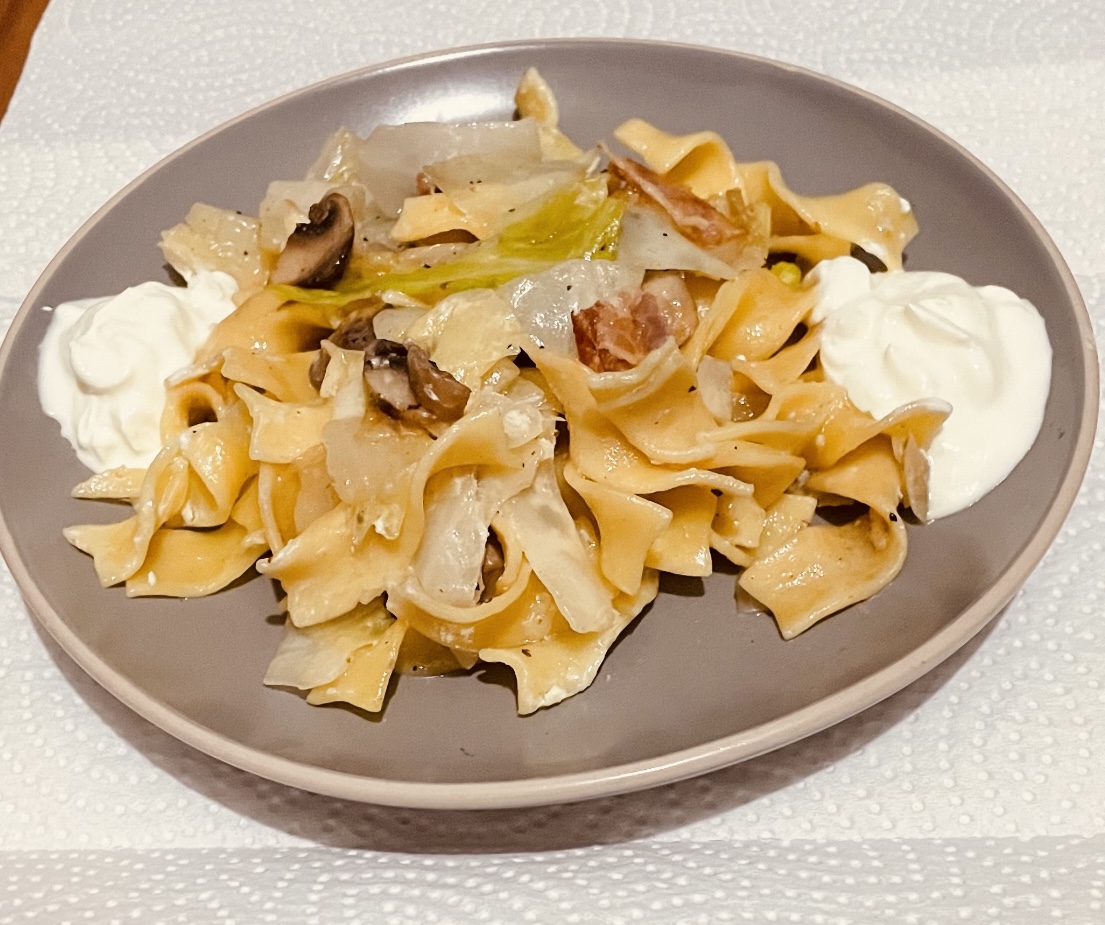
Harvest Pasta Skillet

What to Serve With Lasagna Soup: 10 Best Side Dishes

20 Satisfying Dishes to Serve with Egg Drop Soup

Cheese Ball Recipe

What to Serve With Taco Dip: 9 Yummy Ideas!
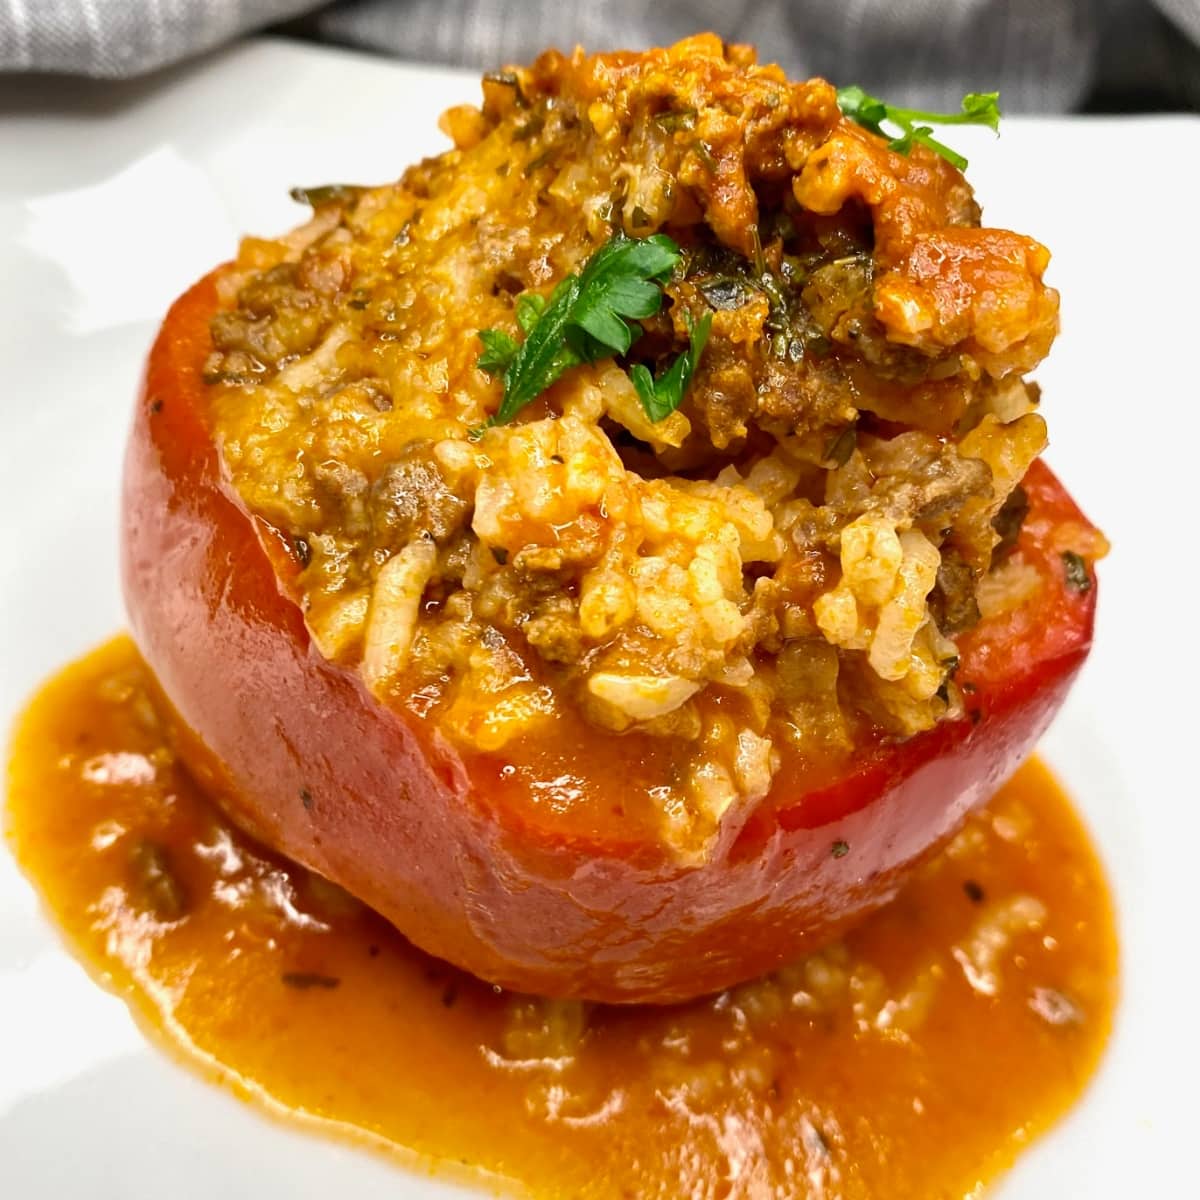
Lebanese Stuffed Bell Peppers
1
2
3