Last Updated on
Finally it is cookie time! I have so many great new cookie recipes to share and I’ve been counting down the days until December 1st to start sharing them. I’m planning to post at least 3 new Christmas cookie recipes a week up until Christmas Day. Typing that now, it seems like a lot. But, personally I believe that you can never have too many cookies!
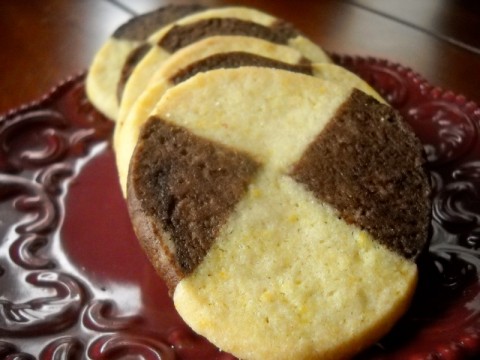
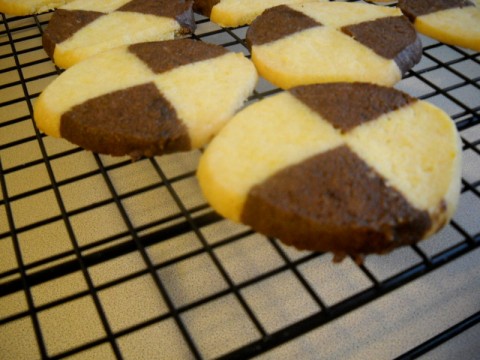
The first Christmas cookie recipe I’m sharing this year is for Orange & Chocolate Checkerboard Cookies. The flavor combination of the orange and chocolate is fantastic! Both provide a subtle flavor that blend together beautifully to create a cookie experience that’s out of this world. The texture of the cookies is crisp when you bite into it but then it melts in your mouth. I could seriously eat these all day long!
The process might sound a little more complicated than your average slice and bake cookie, but it really isn’t. Putting the rolls together took me less than 5 minutes. Trust me, these are not hard cookies to make. I’m not a crafty or fancy baker, but I can make these without a problem.
Orange & Chocolate Checkerboard Cookies
Ingredients
- 1 cup butter, softened
- 1 1/2 cup sugar
- 1 egg
- 1 tbsp freshly squeezed orange juice
- 2 1/2 cup flour
- 1 1/2 tsp baking powder
- 1/4 tsp salt
- 1 tbsp freshly grated orange peel
- 6 tbsp cocoa powder
- 2 tbsp vegetable or canola oil
Instructions
- Beat butter in a large mixing bowl for 1 minute. Add sugar and beat with butter until light and fluffy. Add egg and beat for another minute. Beat in orange juice just until combined.
- In a separate bowl, whisk together the flour, baking powder and salt. Add to the mixing bowl in two portions, beating just until combined after each addition.
- Divide dough in half. Beat the grated orange peel into half the dough.
- In a small bowl, stir together the cocoa powder and oil until well combined. Beat into the remaining half of the dough.
- Form both halves of the dough into equally-sized logs. Wrap each in plastic wrap and refrigerate at least one hour.
- Cut each well-chilled log in half lengthwise. Then cut each half lengthwise in half again.
Notes
 The finished dough can be refrigerated for several days, so you can make the dough whenever you have time and finish up at a later date. You can also freeze the dough. I recommend slicing the assembled logs and then freezing. That way you can just transfer the slices from the freezer to a baking sheet and just increase the bake time by a minute or two.
Stop by Life As Mom for more Christmas Cookies – a whole 12 days worth!
Come join the fun at the My Baking Addiction and GoodLife Eats Holiday Recipe Swap sponsored by Scharffen Berger.
**Join the Christmas cookie conversation by liking Cooking During Stolen Moments on Facebook or following me on Twitter.**