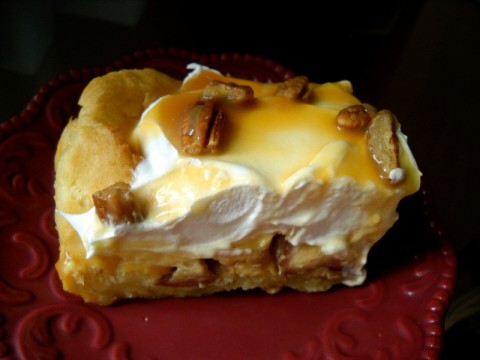
Nothing says fall to me quite like caramel apples. They’re just so perfect in their simplicity. So when I was thinking of a perfect dessert to serve when my husband’s family came to dinner last week, …

Crispy Brussels Sprouts & Red Cabbage with Bacon
Every holiday table has that one dish nobody expects to love. The turkey gets all the attention, the mashed potatoes are a given, but then someone takes a bite of the Brussels sprouts and suddenly the …
Continue Reading about Crispy Brussels Sprouts & Red Cabbage with Bacon →
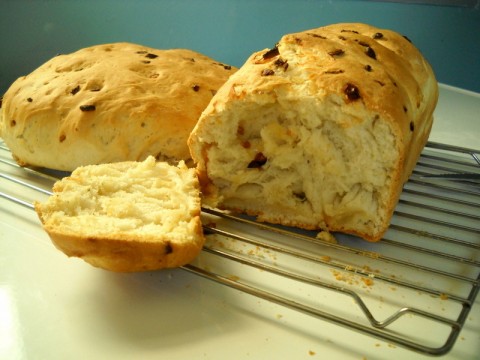
Sweet Onion Bread
I have definitely been reclaiming my baking vibe over the past week or so. I guess that’s what happens when the cooler weather hits and I don’t mind having the oven on all day. I am trying to fit as …